
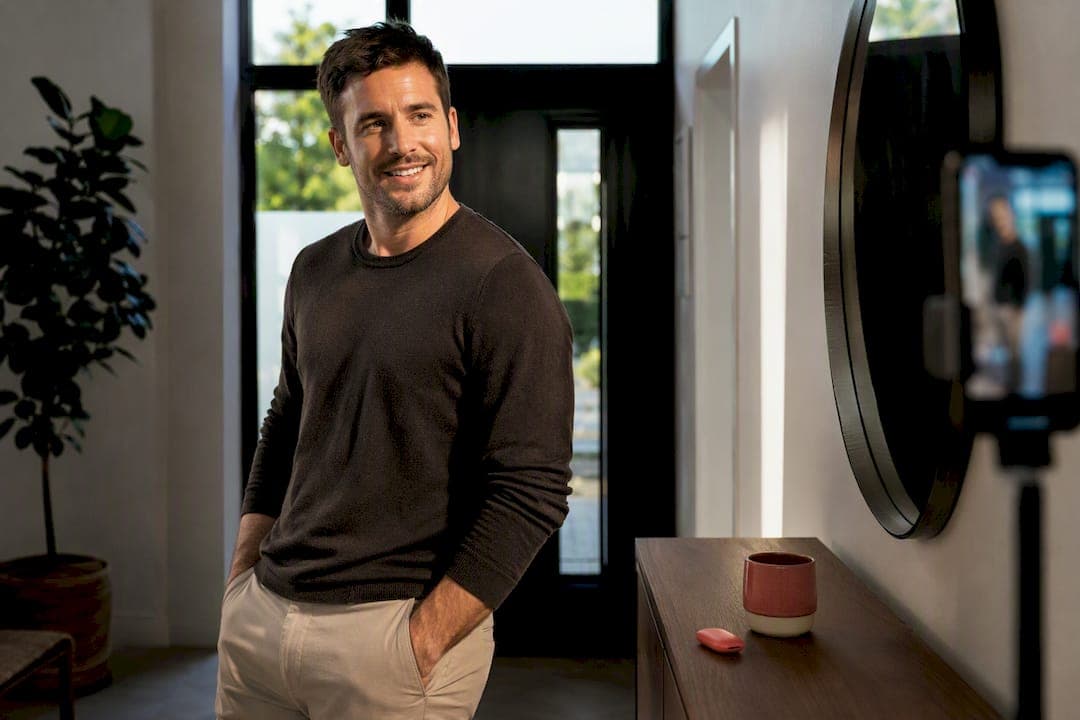
The single best change you can make right now: shoot an eye-level, three-quarter headshot with a genuine smile and dropped shoulders. It reads as approachable at thumbnail size, which is exactly how most people scroll. Two fixes to make before you shoot: drop your shoulders and shift your weight onto one leg, and ditch the sunglasses and group shots for your lead photo.
TL;DR:
- Use a three-quarter headshot with a genuine smile and relaxed shoulders to appear approachable and authentic at thumbnail size.
- Incorporate poses like leaning, walking, seated, over-the-shoulder, or activity shots, and shoot dozens of frames to select the most natural expressions.
- Angle your body about 45 degrees, shift your weight onto one foot, and keep the camera at eye level to create a flattering, depth-filled profile.
- Ensure your hands are engaged in natural gestures, avoid crossed arms or hidden hands, and use micro-actions to add candidness to your photos.
- Prioritize soft, frontal lighting from outdoors or near windows and avoid cluttered backgrounds or heavy filters for a trustworthy, clear image.
Table of Contents
- Best poses for dating photos: a quick catalogue
- How should you angle your body and head?
- Where should your hands and arms go?
- Getting the lighting and camera angle right
- How do you get a genuine smile on camera?
- What should you wear and where should you shoot?
- Five posing mistakes that quietly cost you matches
- How to build a photo lineup that actually works
- What the research and DoubleMyMatches' checklist say
- Get an honest second opinion on your lineup
- A note from The Team @ DoubleMyMatches
- Sources
Best poses for dating photos: a quick catalogue
You don't need a professional shoot to nail this. You need a handful of reliable poses, shot correctly, and the sense to know which one fills which slot in your profile. Photographers who specialise in this exact problem tend to work from a short list of poses that reliably cover the slot types dating apps favour, rather than reinventing the wheel each time — and it produces better engagement than static, frontal selfies, according to Signal Studio NYC's guide to dating profile photos. Here's your working list.
-
The Lean. Find a wall, doorway, or railing. Lean your shoulder against it, cross one ankle over the other, and let your weight settle into the surface. Keep your hands loose, not jammed into a pose. Use this for a relaxed, confident-but-not-try-hard supporting shot.
-
The Walk. Has someone (or a tripod) catch you mid-stride, looking slightly off-camera or back over your shoulder. This one only works with a bit of motion blur or a genuine mid-step moment. It's brilliant for showing you exist in the real world, not just in front of a plain wall.
-
Seated. Sit on a step, bench, or low wall, elbows resting loosely on your knees, chin at a natural angle. This pose is forgiving if you're not used to being photographed because it hides a lot of postural awkwardness while still looking intentional.
-
Over-the-Shoulder. Turn your body away from the camera, then twist your head back towards the lens. It's the single most flattering angle for jawlines and shoulders, and it photographs well even from a distance.
-
The Laugh. Get someone to say something genuinely funny right before the shutter goes, or think of something that actually makes you laugh. Faked laughter photographs terribly. Genuine laughter photographs brilliantly, every time.
-
Activity Shot. Climbing, cooking, playing an instrument, holding a dog's lead mid-walk. The pose here is secondary to the context. Your body naturally falls into a better position because you're focused on the activity instead of the camera.
-
Full-Body Stand. Stand at a slight angle to the camera, weight on your back foot, hands doing something (pockets, holding a jacket, resting on a rail). Full-length shots build trust because they answer the question every profile viewer is silently asking.
Pro Tip: Shoot poses in this order during a self-shoot: start with the Lean and Seated poses to warm up and relax your face, then move to the Laugh once you're loose, and finish on the Walk and Activity shots when your energy is highest. Trying to nail a genuine laugh in your first thirty seconds rarely works.
Testing at volume rather than aiming for one perfect frame matters more than most people realise. Photographers shooting profile pictures typically take dozens of frames per pose and pick the one where the reaction looks real, and that same approach improves keeper rates for self-shoots too. If you're shooting on your own phone, take dating photography tips from that logic: fire off dozens of frames per setup rather than checking the screen after every second shot.
How should you angle your body and head?
Standing square to the camera is the single most common posing mistake, and it's an easy one to fix. Rotate your body about 45 degrees away from the lens, then turn your head back towards the camera. This is the three-quarter turn, and it does two things at once: it adds visible depth to a flat image, and it narrows your silhouette compared with a full-frontal stance.
Photographers consistently point to the three-quarter turn, a weight shift, and an eye-level camera as the three most reliable levers for a flattering portrait, especially at the small size most people view profile photos on — a phone screen scrolled past in under a second.
- Shift your weight onto your back foot rather than standing with feet planted evenly. This creates natural asymmetry through your hips and shoulders.
- Drop your chin very slightly forward and down. It defines your jawline and avoids the double-chin effect that a straight-on, chin-level shot often creates.
- Keep the camera roughly at eye level or a touch above. Shooting up at your face from below (the classic low selfie angle) distorts your nose and chin.
- Stand back and zoom in slightly rather than getting close with a wide lens. Phone cameras distort faces badly at close range, widening noses and rounding cheeks.
There's a research angle here worth knowing. Profiles showing open, expansive body language were associated with a higher likelihood of a positive match response, according to PMC research on nonverbal signals and social perception. A tight, closed stance signals the opposite of what you want your lead photo to say. This is precisely why crossed arms and hunched shoulders undercut so many otherwise decent photos: the posture itself reads as guarded before anyone even looks at your face. Practise the best camera angles for dating photos a few times in the mirror before you shoot, so it feels automatic rather than stiff on the day.
Where should your hands and arms go?
Hands are where most self-shoots fall apart. Left with nothing to do, hands end up jammed in pockets awkwardly, crossed defensively, or hanging like dead weight at your sides. None of it looks natural, because none of it is natural — you're standing still specifically to be photographed, which is an inherently odd thing to do with your body.
Give your hands a job and the rest of your posture tends to follow.
- One hand in a trouser or jacket pocket, thumb hooked outside, while the other hangs loose or holds something.
- Resting a forearm on a railing, wall, or the back of a chair, which also helps create the weight shift and asymmetry covered above.
- Holding a genuine prop: a coffee cup, a jacket slung over one shoulder, a dog's lead.
- Loosely clasped or in motion, such as mid-gesture while talking to whoever's holding the camera.
Avoid crossed arms, which reads as closed off even when you don't mean it that way. Avoid both hands hidden in pockets simultaneously, which flattens your silhouette. Avoid arms held dead straight down your sides, which is the single stiffest pose there is.
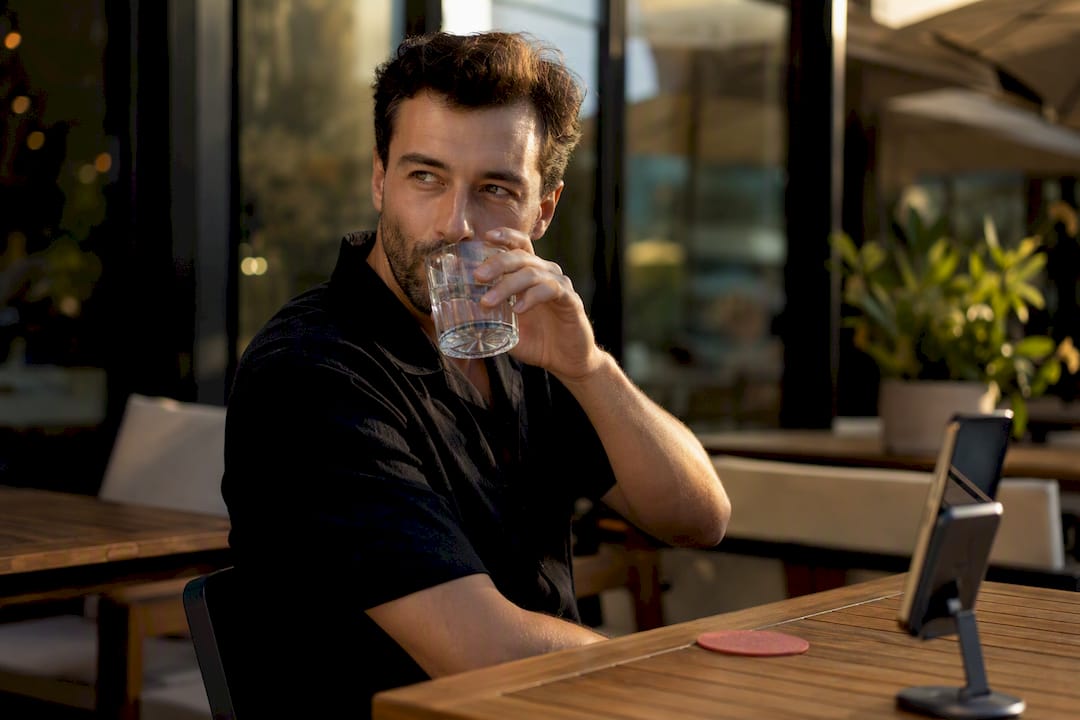
Between frames, give yourself small actions rather than resetting into a static pose each time: adjust your collar, take a sip of a drink, glance away and back, laugh at whatever the person behind the camera just said. These micro-actions are what turn a posed photo into a candid one, and candid consistently outperforms stiff and posed.
Getting the lighting and camera angle right
Fix your light first. It matters more than the pose itself. Soft, frontal light from a window or open shade produces flattering, even skin tones and catches your eyes properly, and photographers treat window or open-shade light as the single most reliable free light source for portraits when you're not shooting in a studio. Direct midday sun creates harsh shadows under your eyes and nose. Overhead indoor bulbs do the same thing indoors, casting shadows down your face that age you by years.
- Shoot within an hour or two of sunrise or an hour or two before sunset outdoors, or find a spot facing a large window indoors.
- Position the camera at your eye level or slightly above, never below. A low angle exaggerates your chin and nostrils.
- If you're shooting solo, step back from the camera and zoom in slightly rather than using the standard close-up selfie distance.
- Better still, hand your phone to a friend, or use a tripod with the self-timer so both hands are free and your posture stays natural.
- Aim for a background that isn't fighting for attention: a plain wall, greenery, or an interesting but uncluttered street scene all work.
Pro Tip: For an at-home mini shoot, pick a time within two hours of sunset, stand facing a window with no direct sun hitting your face, and take at least 15 to 20 frames per pose. You need volume to catch the one frame where your expression looks completely unforced. Camera basics like this also affect how sharp and detailed your final photo looks once it's uploaded and compressed, which is worth understanding through photo quality factors for dating profiles.
How do you get a genuine smile on camera?
A fake smile is easy to spot, even in a small thumbnail. The tell is in the eyes: a genuine smile, often called a Duchenne smile, engages the muscles around your eyes as well as your mouth, creating slight creasing at the corners. A forced smile only moves your mouth, and it reads as stiff even to someone scrolling past in half a second.
You can't will a genuine smile into existence just by being told to smile. You have to trigger it.
- Get into a real conversation with whoever's holding the camera and let them catch you mid-laugh or mid-reaction, rather than posing and then smiling on command.
- Take a breath, let out a small laugh, and shoot on the exhale, when your face is naturally relaxed rather than braced.
- Think of something genuinely funny or good right before the shutter clicks. Recalled emotion produces a more convincing expression than performed emotion.
- Don't default to a smile for every single shot. A relaxed, neutral expression, especially with soft eyes and slightly parted lips, works well for one or two supporting photos and adds variety.
Run a few practice drills before the real shoot: have your friend tell you a joke, ask you something that makes you think, or just chat normally while shots are being taken in the background rather than as the main event. The role expression plays in dating photos is bigger than most people assume, and it's the fastest way to separate an amateur photo from one that looks effortless.
What should you wear and where should you shoot?
Fitted, solid-coloured clothing photographs better than patterns or logos, which pull attention away from your face and can look dated within a couple of years. Stick to colours that suit your skin tone and avoid anything with a large brand name plastered across it.
Backgrounds matter more than people think. A cluttered background competes with you for attention, and a viewer's eye goes to the mess before it goes to your face.
- Choose backgrounds that are either genuinely uncluttered (a plain wall, open sky, calm water) or that quietly suggest a lifestyle (a café counter, a trailhead, a bookshop aisle).
- Pick one meaningful prop per photo at most: a coffee cup, a favourite jacket, a guitar. One prop adds context; three props looks staged.
- Avoid props that scream "arranged for the camera," like holding a book you're clearly not reading or posing with a drink you're not actually drinking.
- Get a haircut a few days before your shoot, not the morning of, so it settles naturally.
- Sleep properly the night before. Tired eyes and dull skin undo good lighting and a good pose faster than almost anything else.
Five posing mistakes that quietly cost you matches
Most weak dating profiles aren't ruined by one dramatic error. They're worn down by five small, repeated ones.
- Bathroom mirror selfies. They signal low effort and often come with poor lighting and background clutter. Swap it for a friend-taken shot or a tripod setup instead.
- Crossed arms. It reads as closed off, whatever your actual mood was. Replace it with a hand in a pocket or resting on a nearby surface.
- Sunglasses or group shots as your lead photo. Your lead photo needs to show your eyes clearly and needs to obviously be you, alone. Archived analyses of dating profile behaviour repeatedly flag both as routine mistakes that reduce matches.
- Heavy filters or overediting. You need to be recognisably yourself when you turn up to meet someone. Overedited photos create a mismatch that damages trust fast.
- Background clutter. Bins, mirrors, other people mid-frame. Often the fix is as simple as moving a metre left or right before you shoot, not choosing an entirely new location.
How to build a photo lineup that actually works
Your lead photo does most of the heavy lifting: it often drives roughly 90% of the initial swipe decision on its own, with supporting photos filling in context afterwards. That's exactly why the verdict at the top of this guide focuses on getting that one shot right before anything else.
Once your lead photo is locked in, build the rest of your lineup with intent rather than uploading whatever's in your camera roll.
- Lead photo: clear eye contact, warm and genuine expression, face unobstructed by sunglasses, hats, or hands.
- Full-body shot: answers the "what do they actually look like" question that every profile viewer is silently asking.
- Activity or hobby shot: gives a real conversation starter and shows a life beyond the dating app.
- Candid laugh or reaction shot: proves the lead photo wasn't a one-off lucky frame.
- Styled portrait: one more polished shot, different background and pose from your lead, to round things out.
Avoid repeating the same pose or background twice; it makes a six-photo profile feel like one photo shown six times. If you're unsure which shot should lead, a quick blind test with a few friends, or an AI-powered coach that ranks photos for you, settles the argument fast.
What the research and DoubleMyMatches' checklist say
The evidence on posture is consistent across sources: open, expansive body language correlates with more positive responses, while closed, defensive posture works against you before anyone reads your bio. Practitioner guides converge on the same three levers again and again: fix your light, fix your angle, then fix your expression, in that order.
DoubleMyMatches was built around exactly this problem. Every photo analysis is discarded after scoring, never published, and never used to train the underlying AI, so feedback on your lineup stays private.
| Checklist item | What to check |
|---|---|
| Lead photo | Eyes visible, no sunglasses, no group shot |
| Body angle | Three-quarter turn, weight on back foot |
| Hands | Doing something, not crossed or hidden |
| Light | Soft, frontal, no harsh overhead shadow |
| Background | Uncluttered or purposefully lifestyle-driven |
| Variety | No two photos share a pose or backdrop |
Screenshot that table or run through the fuller checklist for picking dating photos before your next upload.
Get an honest second opinion on your lineup
You can follow every rule in this guide and still struggle to judge your own photos objectively. That's normal. Nobody is a neutral judge of their own face.
This is exactly the gap DoubleMyMatches was built to close. Upload your shortlist and the AI photo analyser scores each one on lighting, expression, and composition, then tells you which should lead and which are quietly working against you. It's a private, one-time analysis, not a subscription you have to remember to cancel, and nothing you upload gets published or reused. If you've already got a favourite shot and just want a fast sanity check before you commit to it as your lead, the profile picture tester gives you that answer in minutes.
A note from The Team @ DoubleMyMatches
We've seen the same pattern over and over in photo sets people send through: someone swaps a stiff, arms-crossed selfie for a three-quarter shot with their weight on one leg and shoulders dropped, and the difference in how "open" they look is obvious the moment you put both photos side by side. Another common one: a lead photo with sunglasses gets replaced by a plain eye-contact shot, and suddenly the whole profile feels warmer.
None of this requires a professional shoot. It requires testing a few variations and being honest about which one actually works, rather than which one you like because of how you felt that day. Take the photos, compare them properly, and be willing to swap your lead if a supporting shot turns out stronger.
— The Team @ DoubleMyMatches
Sources
- PMC article on nonverbal signals and social perception
- How to take good dating profile pictures: A photographer's guide
- Signal Studio NYC — complete guide to dating profile photos
- Archived Brandwatch analysis of dating profile pictures