
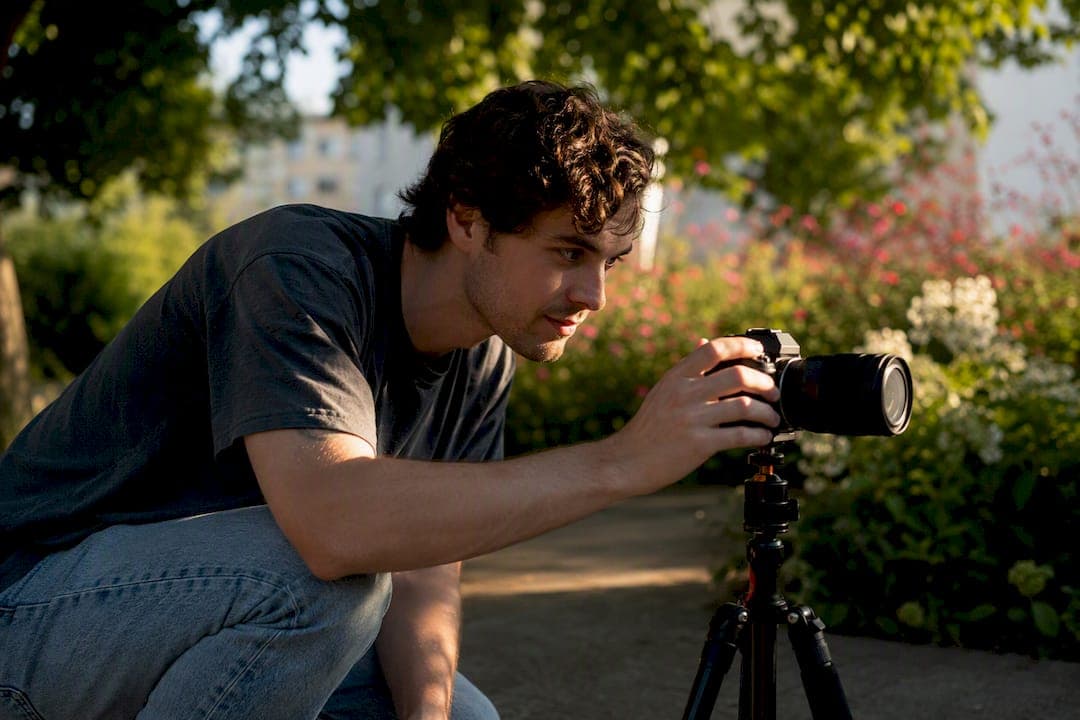
Your safest default is a camera at eye level, a few steps back from your face, with soft natural light and a genuine expression. That single setup fixes the three most common mistakes in dating profile photos: distortion, harsh shadows, and a stiff, try-hard smile.
Here's what to do and what to avoid, right now, before you take another photo:
- Do use a friend's phone or a tripod with a timer, so the camera sits further away than arm's length.
- Don't shoot arm's-length wide-angle selfies. That short distance is what warps your nose and forehead.
- Do lead your profile with your sharpest, most natural eye-level headshot. Save blurry or dark shots for nowhere.
Once you've got the angle and light sorted, the order you place your photos in matters almost as much as the photos themselves. A profile that opens strong and never dips into a weak filler shot will outperform one with a technically better single photo buried on slide four. We'll get to the sequencing science shortly, but the angle rules come first because nothing fixes a bad angle after the fact.
Key Takeaways
The most reliable route to better dating photos is eye-level framing at real distance, soft directional light, a genuine expression, and a profile sequenced best-photo-first.
| Point | Details |
|---|---|
| Default to eye level | Hold the camera level with your eyes and step back at least 1.5 metres to avoid wide-angle distortion. |
| Lead with your strongest headshot | Presenting photos in descending order of attractiveness tends to raise overall ratings compared with ascending order, according to research on anchoring effects. |
| Use soft, directional light | Face a window or stand in open shade rather than shooting under harsh midday sun or overhead bulbs. |
| Give hands a job and vary poses | Hold something, rest a hand in a pocket, or turn a quarter angle rather than facing the camera dead on. |
| Verify choices with an objective audit | DoubleMyMatches scores lighting, composition, expression, and app-specific appeal, then discards your photos after analysis. |
Table of Contents
- Best camera angles for dating photos: what each one signals
- Distance and lens choice: why your phone lies about your face
- Framing and composition: headshot, half-body or full-body?
- Lighting tips for dating photos that actually flatter every face
- Expression and eye contact: looking approachable, not posed
- Poses, posture and hands that read well on small screens
- Photo sequencing: why the order of your photos changes how attractive you look
- Shooting setups you can run alone or with a friend
- Wardrobe, backgrounds and what to leave out of frame
- Editing and retouching: where to draw the line
- A quick shot list to run in one session
- How an AI photo audit checks your angle choices before you commit
- A note from The Team @ DoubleMyMatches
- Get an objective second opinion on your best angle
- Sources
Best camera angles for dating photos: what each one signals
Camera angle changes how a face reads to a stranger scrolling past in half a second. Get this wrong and even good lighting won't save the photo.
Eye level is your default, full stop. It's the angle your eyes actually use to read other faces day to day, so it produces the most recognisable, trustworthy version of you. Photography Shark Studios points out that prioritising light, angle, and expression, in that order, produces better results than chasing fancier gear, and eye level is the angle that makes that combination easiest to nail. If you only change one thing about how you take photos, hold the camera level with your eyes rather than below your chin or above your head.
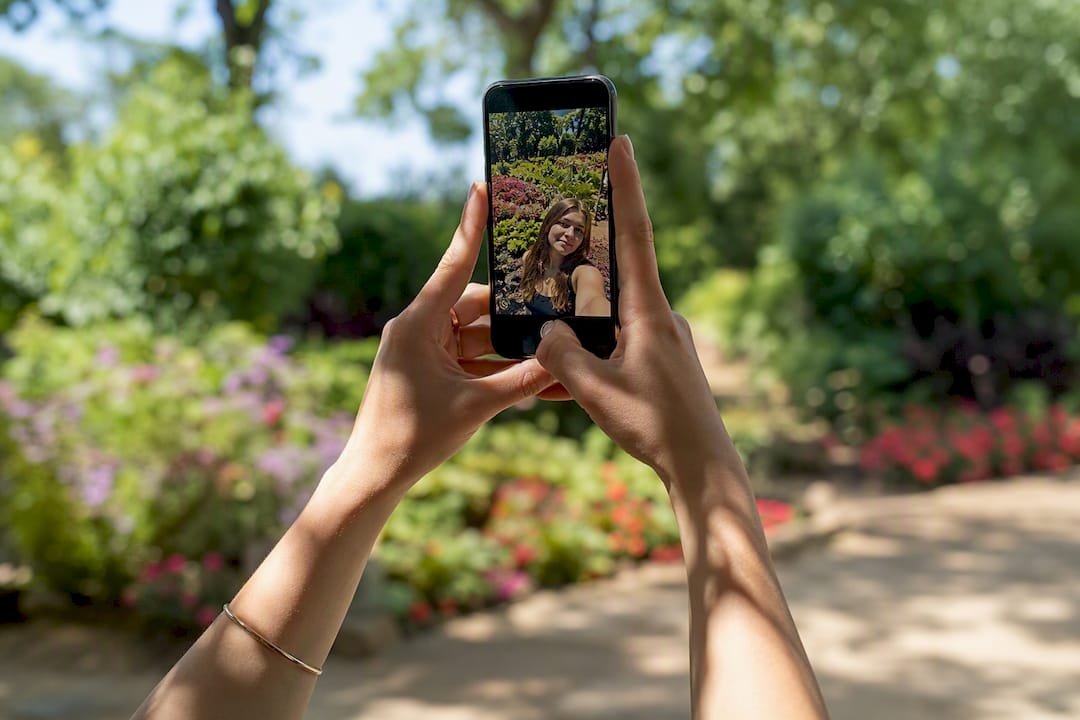
Slight high-angle works when you want a softer, friendlier read. Position the camera a little above eye level, angled down, roughly the height difference of someone standing a step higher than you. This narrows the jawline slightly and opens the eyes, which is why it's a favourite for anyone wanting a warmer first impression. Push it too far, though, and you get the "looking up at a giant" effect, which reads as awkward rather than approachable.
Slight low-angle does the opposite: camera just below eye level, angled up. Filmmakers use extreme low angles to make subjects look powerful or dominant, and that same logic applies at a smaller scale here. A gentle low angle can lend a confident, grounded posture. Taken too far, it tips into looking domineering or, worse, unintentionally strange, since the same geometry that reads as confident on a Hollywood set can read as intimidating on a five-inch screen.
- Straight-on, close, wide lens — the classic phone-selfie mistake. Fix it by stepping back and zooming instead of moving closer.
- Extreme high-angle from above — makes eyes look oversized and chin recede. Fix it by lowering the camera to just above eye level.
- Extreme low-angle from below — exaggerates the nostrils and jaw. Fix it by raising the camera closer to eye height.
- Tilted or "Dutch" angles — StudioBinder's breakdown of camera angles in film notes these read as unstable or disorienting, which is the last thing you want a stranger's first impression of you to feel like.
Pro Tip: Take the same pose at three angles, eye level, slight high, slight low, in the same light. Compare the thumbnails side by side on your phone, not full screen. Whichever looks most like "you" on a small screen is the one to keep.
Distance and lens choice: why your phone lies about your face
Phone front cameras use wide-angle lenses, and wide lenses distort anything close to them. Hold your phone at arm's length for a selfie and you're roughly 30 to 40 centimetres from the lens, close enough that your nose, forehead, and chin all sit at slightly different distances from the camera. The lens exaggerates whatever's nearest, which is almost always your nose.
Professional portrait photographers solve this with distance, not gear. Photography Shark Studios explains that pulling back and using a longer focal length renders facial proportions the way people actually see you, because compressing the distance is what causes the distortion in the first place. The practical fix for anyone without a proper camera is simple: get further away and zoom in optically rather than digitally, or hand the phone to a friend and step back yourself.
A few rules that make this workable without buying anything:
- Stand at least 1.5 to 2 metres from the camera for a head-and-shoulders shot, more for half-body or full-body.
- Use your phone's optical zoom (usually 2x on modern phones) rather than pinch-zooming digitally, which just crops and loses sharpness.
- Never use the ultra-wide lens setting for a portrait, even by accident. Check which lens your camera app defaults to before you shoot.
- If a friend is holding the camera, have them stand back rather than crouch closer, distance matters more than angle here.
To test whether a shot is distorted, look at your ears and the sides of your face in the frame. If your face looks noticeably wider at the edges than in the centre, or your nose looks larger than it does in the mirror, that's lens distortion talking, not your actual face. Retake it two steps further back.
- Check the edges of the frame for warping, especially near your ears.
- Compare the photo to how you look in a normal mirror, not a magnifying one.
- If in doubt, take the same shot at three distances and pick the one where your proportions look most balanced.
Framing and composition: headshot, half-body or full-body?
Different slots in your profile need different framing, and getting them mixed up wastes your best photos on the wrong job.
Your primary photo should almost always be a head-and-shoulders shot, sharp, well lit, eye level, because that's the one shown as a tiny thumbnail before anyone taps into your full profile. Anything busier than a clean headshot gets lost at that size. Your secondary and later photos are where half-body and full-body shots, and activity photos, earn their place, giving matches a fuller picture of what you look like and what you actually do.
Composition rules that hold up at thumbnail size:
- Position your eyes roughly a third of the way down the frame, not dead centre, using the classic rule of thirds.
- Leave a little space above your head rather than cropping tightly to the hairline.
- Check how the photo looks as a small square crop before you upload it. Most apps crop your primary photo into a circle or square thumbnail, and detail that reads fine full screen can vanish at that size.
- Keep the background separated from your outline. A cluttered background that's the same tone as your jacket makes you blend into the scene rather than stand out from it.
- Avoid photos where small details, a busy sign, another person's face, a stray hand, pull the eye away from you within the first second of viewing.
Half-body shots work well for showing outfit and general build without the full-length compression that can flatten proportions from a distance. Full-body shots are useful once, maybe twice, in a profile, mostly to confirm honesty about build and height rather than as a flattering angle in their own right.
Lighting tips for dating photos that actually flatter every face
Light does more work than angle in most bad photos. A perfectly framed shot under harsh overhead light will still look worse than an average composition in soft, even light.
- Soft window light is the easiest source most people have at home. Stand facing a window with diffuse daylight, not direct sun through glass, and you get even light across the face with soft shadows that flatter almost every skin tone.
- Open shade outdoors does the same job outside. Standing just inside the shadow of a building or under a tree, facing out towards open sky, gives soft, directionless light without the harsh contrast of direct sun.
- Golden hour (the hour after sunrise or before sunset) adds warmth and low-angle sunlight that's flattering almost universally, though it requires timing your shoot around it.
On a budget, a plain white sheet or a large piece of white card held just out of frame can bounce light back into shadows under the eyes and jaw, doing the job of a proper photography reflector for free. A sheer white curtain over a window works as an improvised diffuser if your only light source is a bit too harsh.
Two lighting setups to avoid outright: harsh midday sun, which creates deep shadows under the eyes and brow, and direct overhead indoor bulbs, which cast unflattering shadows straight down the face. If you're stuck with either, move closer to a window, turn away from the overhead light, or reschedule for golden hour instead of trying to fix it after the fact.
Pro Tip: If you only have one lighting option available today, face a window rather than have it behind you. Backlighting turns your face into a silhouette, and no amount of editing later will properly rescue that.
Expression and eye contact: looking approachable, not posed
A genuine smile changes the muscles around the eyes, not just the mouth. Photographers sometimes ask subjects to think of something specific and mildly funny right before the shutter clicks, because a smile triggered by an actual thought looks different from one held for the camera, and strangers can tell the difference at a glance.
- Try laughing at something a friend says just before the photo, rather than saying "cheese" and holding a pose.
- Relax your jaw slightly and drop your shoulders. Tension shows up first around the mouth and eyes.
- Direct eye contact with the lens reads as confident and open, and works well for your primary photo.
- A slightly averted gaze, looking just past the camera or at something in the scene, can soften an activity or candid shot without looking evasive.
- Avoid the flat, closed-mouth "profile smile" in every single photo. Variety across your set of photos, from a big grin to a relaxed half-smile, reads as more authentic than five identical expressions.
- A small forward tilt of the chin, rather than tucking it down, keeps the jawline defined without looking stiff.
Micro details matter more than people expect at thumbnail size. A slightly raised brow reads as engaged and alert, while a tense, low brow can accidentally read as annoyed even when you're not. Check a few frames from a burst rather than relying on the single shot you happened to take, since expressions shift within a second and the difference between "awkward" and "great" is often just half a beat of timing.
Poses, posture and hands that read well on small screens
Posture fixes more photos than people realise. Standing with your weight slightly forward and shoulders back, rather than slouched or leaning heavily on one hip, immediately elongates the torso and makes clothes sit better in frame.
- Turn your body about a quarter turn from the camera rather than facing it dead on. This slims the silhouette and looks more natural than a straight-on stance.
- Keep your chin slightly forward rather than tucked, which avoids the double-chin effect that a downward-tilted phone camera makes worse.
- Hands are the biggest giveaway of a stiff pose. Give them a job: hold a coffee cup, rest one in a pocket, hold a jacket over one shoulder, or lean a hand lightly on a wall or railing.
- Avoid crossing both arms tightly across your chest, which reads as closed off rather than confident.
- For half-body and three-quarter shots, try a few variations, one arm relaxed at your side, one hand in a pocket, weight shifted onto one leg, and compare them rather than settling on the first pose you try.
Pro Tip: If you don't know what to do with your hands, movement helps more than a held pose. Walk toward the camera and have your friend shoot mid-stride, or turn to laugh at something just off camera. Motion breaks the stiffness that a held, static pose almost always creates.
Photo sequencing: why the order of your photos changes how attractive you look
The order you present your photos in changes how attractive people rate the whole set, not just which individual photo they happen to see first. Research published in the SAGE journal on anchoring effects in facial attractiveness found that arranging photos in descending order, best to worst, produced higher overall attractiveness ratings than the same photos shown in ascending order. The first photo anchors the viewer's judgement of everything that follows.
The British Psychological Society's coverage of sequence effects makes a related point: sequence and context alter impression formation more than people assume, which is why the order of a face-matching task or a set of profile photos genuinely shifts how those faces get judged. Separate research on online image presentation found that primacy and recency effects, whether the first or the last item in a sequence gets remembered best, shift depending on how many images are shown in total. With a typical dating profile of four to six photos, the practical takeaway is the same either way: your opening photo carries the most weight, and your closing photo is the second most scrutinised.
A photo set shown in descending order of attractiveness produced measurably higher attractiveness ratings than the identical set shown in ascending order, according to the SAGE anchoring study.
A workable sequencing template for most profiles:
- Slot 1: your strongest, sharpest, eye-level headshot. This is your anchor.
- Slot 2: a half-body shot that confirms build and style.
- Slot 3: an activity or hobby photo that adds context and conversation starters.
- Slot 4 to 6: a mix of full-body, candid, and social shots, roughly descending in strength.
Test your ordering the same way you'd test anything else: show a friend the set for five seconds and ask which photo they noticed first and which one they'd swipe past. A small trial upload, or a private AI audit of photo order will usually confirm whether your instinct about your "best" photo actually matches how strangers rank it.
Shooting setups you can run alone or with a friend
You don't need a studio. You need a stable camera, decent light, and enough distance to avoid distortion.
- Tripod and timer setup. Prop your phone on a tripod, or stack it against books, at eye height, 1.5 to 2 metres from where you'll stand. Set a 10-second timer or use a Bluetooth remote if your phone supports one, so you're not lunging into frame right as the shutter fires.
- Friend-assisted shoot. Give clear, simple direction rather than vague ones: "look just past my shoulder and laugh," "walk toward me slowly," "turn your chin down a touch." Specific instructions produce more natural results than "just act natural," which tends to freeze people up.
- Phone settings to check first. Turn on Portrait mode for a soft background blur on close shots, but check it doesn't blur part of your face by mistake. Tap to set exposure on your face specifically, not the background, especially outdoors where the sky can trick the camera into underexposing you. Leave HDR on for outdoor daylight shots, where it helps balance bright sky against your face, but consider switching it off indoors where it can sometimes flatten contrast unnaturally.
- Take more frames than feels necessary. Twenty or more shots per pose isn't excessive, since keeper rates from a casual shoot are genuinely low and expressions shift from frame to frame. Label folders by shot type, headshot, half-body, activity, as you go, so reviewing later doesn't mean scrolling through eighty near-identical thumbnails in random order.
Wardrobe, backgrounds and what to leave out of frame
Solid colours with reasonable contrast against your background read better as a small thumbnail than busy patterns or prints, which can turn into visual noise at that size. A navy jumper against a pale wall reads clearly; a small floral print against a similarly busy background just blurs together.
Backgrounds that add real signal, a climbing wall, a hiking trail, a familiar local landmark, give matches something to comment on and say more about you than a plain studio backdrop ever could. The key is restraint: one clear contextual detail helps, three competing ones distract from your face, which is still the actual point of the photo.
- Avoid large visible logos or branding on clothing, which pull the eye away from your face.
- Skip busy or cluttered backgrounds, a messy kitchen counter, a crowded pub, unless the shot is specifically about that context.
- Leave out props that need explaining. If a friend needs a caption to understand what's happening in the photo, a stranger swiping past definitely will.
- Choose backgrounds with tonal contrast to your outfit so your outline stays clearly separated from the scene.
Editing and retouching: where to draw the line
Small corrections keep a photo honest while still looking its best. Adjusting exposure, cropping to a better composition, and removing a temporary blemish are all reasonable, they don't change how you actually look day to day.
Heavy retouching, reshaping your jaw, smoothing skin texture until it looks artificial, or major body reshaping, crosses into misleading territory, and it tends to backfire anyway. As the practical logic in most photographer guidance puts it, the goal is recognition, not perfection: your photos should look like you, so that meeting in person isn't a surprise for the other person. A profile that oversells your appearance sets up a first date to underdeliver before you've even said hello.
- Keep edits to exposure, white balance, cropping, and minor blemish removal.
- Avoid heavy skin smoothing filters, structural reshaping, or anything that changes your actual proportions.
- Export at your app's recommended resolution rather than the largest file size possible, since over-compression on upload can introduce artefacts that heavy edits made worse in the first place.
- If you're unsure whether a photo still looks like you, ask a friend for an honest opinion rather than editing it further. A second opinion catches what editing software can't.
A quick shot list to run in one session
Book 30 to 45 minutes, pick one location with decent light, and work through this order:
- Primary keeper: eye-level head-and-shoulders shot in soft window light or open shade, taken from at least 1.5 metres away. Take 15 to 20 frames of this alone.
- Half-body: same light, quarter turn to the camera, hands doing something natural.
- Activity shot: whatever you'd naturally be doing, a hobby, a walk, a coffee, shot candidly or semi-candidly.
- Full-body: further back, full outfit visible, still at eye level.
- Candid or laughing shot: triggered by a friend saying something funny just before the shutter, not posed.
- Take at least 15 to 20 frames per pose rather than two or three.
- Label folders by shot type as you shoot, headshot, halfbody, activity, fullbody, candid, to speed up review later.
- Review on a phone screen, not a laptop, since that's how most matches will actually see your profile.
How an AI photo audit checks your angle choices before you commit
Getting the angle right in the moment is one thing. Knowing which of twenty near-identical shots actually performs best is a different problem, and it's exactly what an objective audit solves better than your own eye can, since you're too familiar with your own face to judge it the way a stranger will.
DoubleMyMatches scores each photo you upload against the same factors that decide swipes: lighting, composition, expression, and app-specific appeal for Tinder, Hinge, or Bumble. The AI photo analyser ranks your set from strongest to weakest, which takes the guesswork out of deciding which headshot deserves your primary slot.
- Every factor covered in this article, angle, distance, light, expression, gets scored objectively rather than judged by gut feeling.
- Photos are analysed once and then discarded. Nothing is published or used to train the AI.
- When two shots look nearly identical to you, the audit's per-photo feedback usually reveals a clear difference in composition or expression that decides which one to keep.
- Works for both men and women building profiles on any major dating app.
A note from The Team @ DoubleMyMatches
Most of the angle mistakes covered here come down to one habit: shooting too close, too often, with the same lens and the same light every time. Fixing that isn't about expensive gear. It's about distance, timing, and taking more frames than feels necessary, because the frame that actually looks like you rarely shows up first.
We built DoubleMyMatches because most people can't judge their own face objectively. You're too used to how you look to spot what a stranger notices in half a second. That's exactly the gap an outside, private audit is meant to close.
Run the checklist in this guide, take your twenty frames, and don't be afraid to test a few genuinely different setups before you settle. Your photos are private with us: analysed once, then discarded.
Get an objective second opinion on your best angle
Every rule in this guide, eye level versus high angle, soft window light versus harsh overhead bulbs, best-first sequencing, still leaves one problem: you're the worst-placed person to judge which of your own photos actually works. DoubleMyMatches solves that with a private, one-time AI audit that scores your shots the way a stranger swiping past actually would, not the way you see yourself in the mirror.
Upload your shortlist and the dating photo analyser ranks them by lighting, composition, expression, and app-specific appeal, then tells you which one belongs in your primary slot and how to order the rest. If you just want a quick, low-cost check on one or two shots before a full profile refresh, the profile picture tester gives you that without committing to a full report. Every photo is analysed and then discarded, never published, never used to train the AI, so the feedback stays entirely yours.
Run your best three headshot candidates through the audit tonight and let the ranking settle the argument your own eye can't.
Sources
- Anchoring effects in facial attractiveness (SAGE journals)
- Photo ID vs sequence: why order matters | British Psychological Society
- The effects of online product presentation on consumer responses: a mental imagery perspective (Journal of Product & Brand Management, 2024)
- How to take good dating profile pictures: a photographer's guide (Photography Shark Studios)