
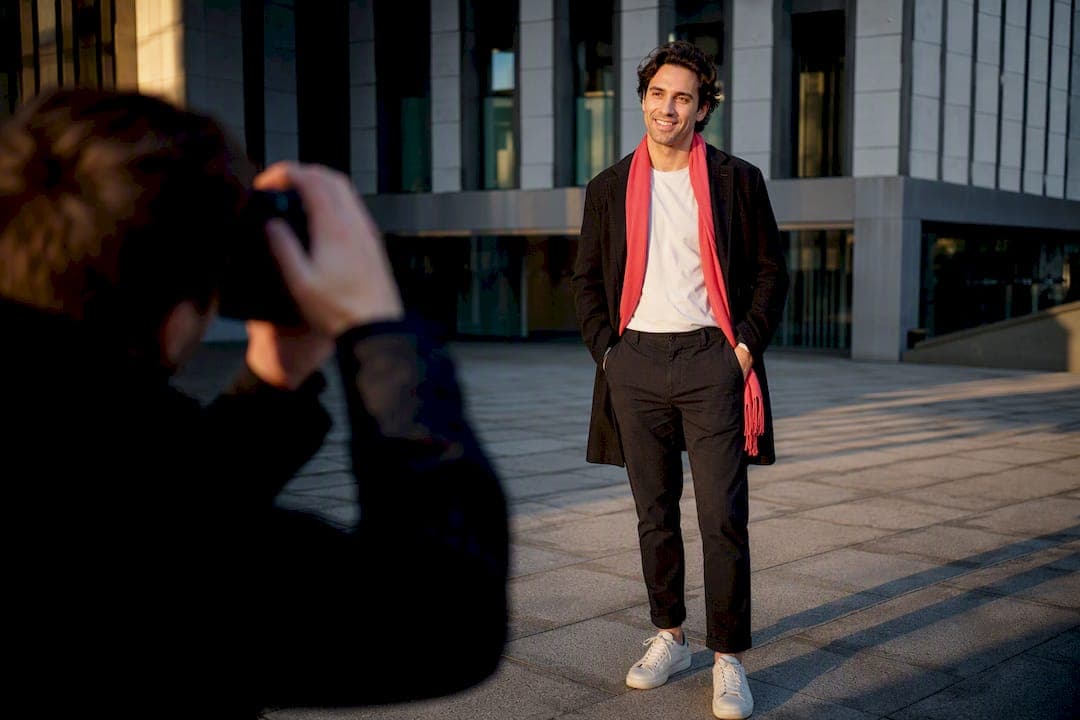
Yes, you need a full-body dating photo, and no, it doesn't need to be head-to-toe. A knees-up shot is usually enough to give viewers an honest sense of your build and how you carry yourself. Its main job isn't to show off. It's to remove doubt, so matches feel confident enough to keep swiping, and to keep the whole thing tasteful rather than staged.
TL;DR:
- Use a knees-up full-body photo to clearly show your build, posture, and outfit without needing a head-to-toe shot, which suits most settings.
- Shoot in soft, natural lighting with proper camera height, steady positioning, and natural poses, avoiding filters and staged stances for authenticity.
- Keep backgrounds simple and clothing fitted, avoiding heavy filters, cropping group shots, or editing that erodes trust or causes distortions.
- Test multiple shots with objective tools or trusted feedback to select the most natural, well-lit, and proportionate image before posting.
- Avoid common errors like mirror selfies, awkward angles, and cropped or heavily edited images that undermine appearance and trustworthiness.
Table of Contents
- What counts as a full body dating photo (and why you need one)
- How to take flattering full body photos, step by step
- Full body poses that actually look natural
- Outfit and background choices that photograph well
- Camera angles and composition that flatter your shape
- Choosing your best full body shot and testing it before you post
- Full body photo mistakes that quietly cost you matches
- What professionals and AI coaches actually look for in full body dating photos
- The team @ DoubleMyMatches: what our testing shows
- A private, one time check before your full body photo goes live
- Sources
What counts as a full body dating photo (and why you need one)
A full-body dating photo is any shot that shows your build clearly, roughly from the knees up or, less often, head to toe. You don't need a fashion-magazine pose. You need a photo that answers the question every viewer is quietly asking: "What does this person actually look like standing up?"
Knees-up framing works for most profiles because it captures posture, general shape, and how you dress, without needing a wide shot from ten feet back. Full head-to-toe shots suit outdoor settings, activity photos, or when shoes and trousers add real character to the outfit. Either version is acceptable for a dating profile, because the goal is honesty, not a portfolio piece.
This photo does specific work inside your lineup that your other shots can't do:
- Your headshot grabs attention and shows your face clearly.
- Your activity photos show personality and interests.
- Your full-body shot confirms proportions and closes the gap between "attractive face" and "what will they actually look like on a date?"
Skip it, and you leave that question open. Most people fill an information gap with worst-case assumptions, not generous ones. A genuinely varied photo lineup that includes a full-body shot alongside close-ups and activity images shows the "full you" and avoids surprises on a first date, which dating experts consistently point to as one of the four essential photo types worth having.
The psychological effect is simple. When someone can see your build before matching, they're matching with accurate information. That tends to translate into first dates that don't start with a flicker of surprise on someone's face, and matches that stick around instead of vanishing after one message.
How to take flattering full body photos, step by step
Full-body shots are notoriously hard to get right on the first try. Lighting shifts, angles distort, and phones do strange things to proportions when you're not paying attention. Here's a routine that removes most of the guesswork.
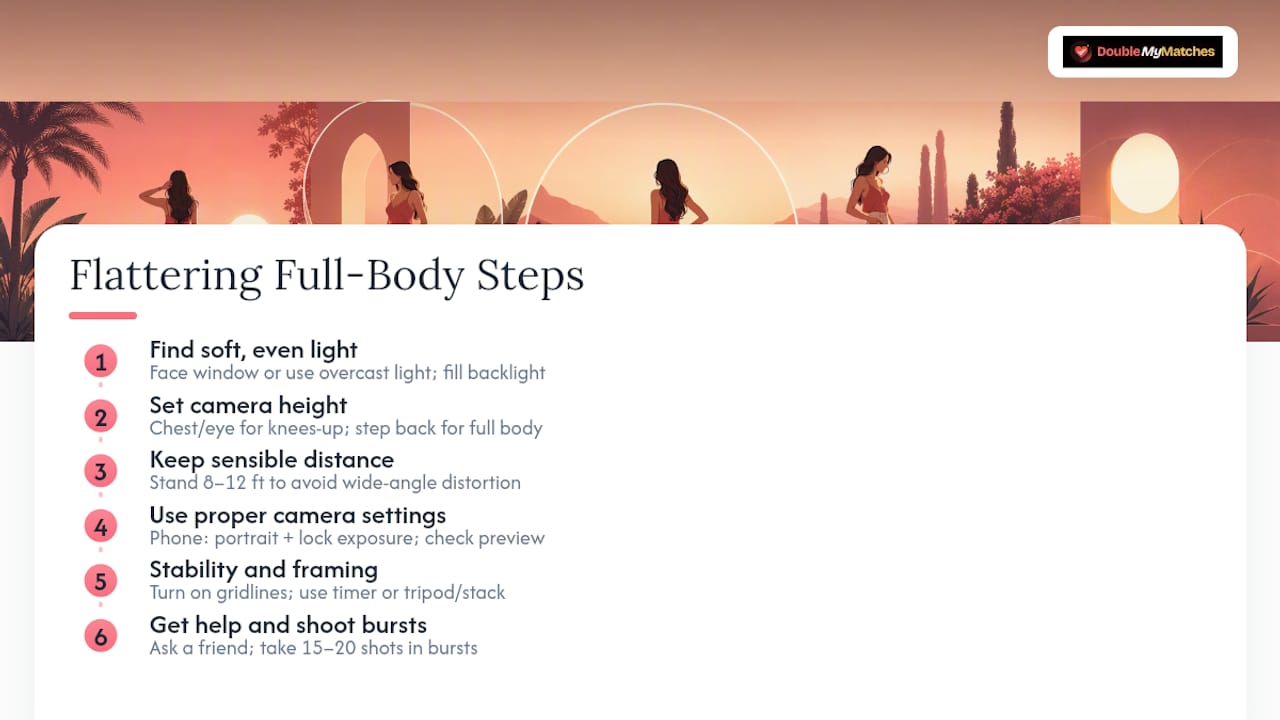
1. Find soft, even light before you touch the camera. Face towards a window or shoot during overcast daylight outdoors. Direct sun creates harsh shadows across your face and body that flatten detail. If you're shooting near a window with strong backlight, add a lamp or reflective surface (a white wall works fine) to fill in the shadow side of your face and torso.
2. Set the right camera height for the shot you want. For a knees-up photo, hold the camera roughly at chest or eye height. For a full head-to-toe shot, step back rather than tilting the lens down. Tilting down from a normal standing height distorts your head and shoulders, and tilting up from a low angle can widen your midsection unnaturally.
3. Keep your distance sensible. Standard phone cameras use a wide-angle lens by default, and wide angles distort anything close to the frame edge. Standing 8 to 12 feet away for a full-body shot avoids the "fisheye" stretch you sometimes see in bathroom mirror selfies.
4. Use portrait mode and lock your exposure.
On a phone, portrait mode helps separate you from the background with a natural blur, though it can misfire around limbs, so check the preview. Tap to focus on your torso, then hold your finger down to lock exposure so the camera doesn't hunt for focus as you move.
5. Turn on gridlines and use a timer. Gridlines help you keep the horizon straight and your body centred. A 3 to 10 second timer, or a Bluetooth remote, gives you time to settle into a natural pose instead of holding a stiff pose while lunging for the shutter button.
6. If you're shooting with a proper camera, keep it simple. An aperture around f/4 to f/5.6 keeps most of your body in sharp focus without blurring the background into mush. A focal length equivalent to 35mm to 50mm on a full-frame camera avoids the distortion you get from wider lenses shot up close.
7. Set up a stable base. A tripod, a stack of books, or a fence post all work. Stability matters more than the equipment. A slightly wobbly handheld shot from a friend often beats a technically perfect tripod shot with a stiff, staged pose.
8. Get someone else behind the camera when you can. Full-body shots are genuinely difficult to self-shoot well, because you can't check your posture and framing at the same time. Asking a friend for five minutes, and shooting a few natural walks or casual poses rather than one static frame, usually produces better results than a solo mirror attempt.
9. Shoot in bursts, not single frames. Take 15 to 20 shots across a couple of poses and angles. Natural expressions and relaxed posture rarely show up on the first frame. They show up around frame 8 or 12, once you've stopped thinking about the camera.
Pro Tip: Shoot at the same time of day you'd actually meet someone. Golden hour light flatters everyone, but if your dates happen at 7pm on a Tuesday, a photo taken in midday sun sets an expectation your in-person lighting won't match.
For a deeper breakdown of lens choice and exposure settings by camera angle, this guide to dating photo camera angles is worth a look once you've got the basics down.
Full body poses that actually look natural
Stiff, front-on, arms-at-your-sides poses are the single most common giveaway of a photo taken specifically for a dating app. The fix isn't more effort. It's small adjustments that mimic how you'd naturally stand if a friend snapped a candid photo mid-conversation.
The standing pose recipe: shift most of your weight onto your back leg, angle your torso slightly away from the camera rather than facing it dead-on, and let one hand rest in a pocket or hold something (a coffee cup, a jacket over one shoulder). This single adjustment, weight shifted and torso angled, does more to look relaxed than any facial expression.
The movement recipe: walk towards the camera and get caught mid-stride, or walk away and glance back over your shoulder. Photographers rely on movement and asymmetry specifically because static poses read as posed, while motion reads as candid, even when it's carefully set up.
Sitting and leaning options: a low wall, a stair step, or a doorway frame all give you a different proportion story than standing straight. Sitting with forearms resting on your knees shows your build without the full standing silhouette, which works well if you want variety across your photo set without repeating the same standing shot three times.
A few concrete rules for hands and expression:
- Never clench your fists. Relaxed fingers, even in a pocket, read as calm.
- Give your body some asymmetry. Two feet planted shoulder-width apart, arms straight down, is the pose that looks most like a passport photo.
- Use a genuine prop (a drink, a dog leash, a jacket) to give your hands something real to do instead of posing them.
- If in doubt, look slightly off-camera rather than dead into the lens. It reads as more natural in a full-body shot than a headshot.
Pro Tip: Ask whoever's shooting to talk to you between frames instead of counting down to a pose. The photo taken right after you laugh at something someone said is almost always better than the one where you're "ready."
For a full walkthrough with specific standing, walking, and sitting setups you can run through in one session, photographer-approved poses for men covers seven you can shoot solo or with a friend in under 20 minutes.
Outfit and background choices that photograph well
Clothing does more work in a full-body shot than in a headshot, because it's most of what's visible. Block colours photograph more cleanly than busy prints or logo-heavy pieces, which tend to pull the eye away from you and towards the pattern instead.
Fitted layers create a clean line without looking tight. A shirt that's slightly too loose reads as sloppy in a full-body frame in a way it wouldn't in a close-up. Trousers or jeans that sit at the right length, no bunching at the ankle, no dragging on the ground, make a bigger visual difference than most people expect.
Layers add shape where a single flat garment doesn't. A jacket, an open shirt over a plain tee, or rolled sleeves all introduce texture and structure that a single-colour top on its own can lack. Shoes matter more than they get credit for. Scuffed trainers or ill-fitting shoes draw attention in full-body shots precisely because they're at the bottom of the frame, where the eye naturally lands last and lingers.
Backgrounds should be simple enough that they don't compete with you:
- A plain wall (brick, painted concrete, a clean building exterior) keeps focus on your silhouette.
- A park path or open outdoor space with some greenery softens the frame without introducing visual noise.
- A neutral interior, a hallway, a plain room, works if the lighting is even and there's no clutter behind you.
Match the background to the story that photo is telling. A gym background says something different to a park bench, and both are fine as long as the setting doesn't fight the framing.
One more point worth being blunt about: keep editing light. Skin smoothing, slimming filters, and heavy retouching tend to backfire the moment someone meets you in person, and that mismatch damages trust faster than an unedited photo with a slightly awkward angle ever would. If grooming details matter to you, small, honest touches, like sorting out teeth whitening before a photoshoot, hold up far better under scrutiny than digital retouching does. The same logic applies to skin: aesthetics professionals generally agree that looking natural in photos means enhancing what's already there rather than smoothing it into something unrecognisable.
Camera angles and composition that flatter your shape
Camera height changes how your proportions read more than almost any other single variable. A camera positioned at eye level or slightly above tends to be the safest default for most body types, because it avoids the two extremes that cause problems.
Shoot from too low an angle, and the camera exaggerates whatever's closest to the lens, usually your midsection or legs, making you appear wider than you are. Shoot from noticeably above eye level, and the effect reverses: the body appears slightly elongated and slimmer, which is why a lot of confident full-body shots are taken from a slightly raised angle rather than straight-on.
The adjustment doesn't need to be dramatic. Photographers point out that moving a camera 10 to 20 centimetres higher or changing the angle by 5 to 10 degrees can noticeably shift how proportions read in the final shot. That's a small, testable range you can experiment with in a single session rather than a full lighting setup you need to rebuild each time.
Distance matters just as much as height. Standing too close to the camera, especially with a phone's wide-angle lens, distorts whatever's nearest the edge of the frame. Stepping back and using a moderate focal length, or simply zooming slightly on a phone instead of physically standing closer, avoids that stretch entirely.
A few framing rules worth following every time:
- Leave a little headspace above your head rather than cropping it tight against the top of the frame.
- Never crop a limb at a joint, an elbow or a knee mid-frame looks accidental and slightly odd. Crop above or below the joint instead.
- Default to knees-up framing when you're unsure. It's more forgiving of small distance and angle errors than a full head-to-toe shot, and it still does the job of confirming your build.
- Keep the camera roughly level. A tilted horizon in the background is a small detail that quietly signals "quick phone snap" rather than "considered photo."
If you want a deeper technical breakdown of how specific angles change perceived proportions across different body types, the guide on camera angles for dating photos walks through several side-by-side comparisons worth studying before your next shoot.
Choosing your best full body shot and testing it before you post
Take twenty photos across two or three poses, and you'll usually have three or four genuine contenders. Picking between them shouldn't come down to a gut feeling in the moment. It should follow a repeatable process.
1. Run each contender through a quick checklist. Is the lighting even, with no harsh shadow across half your face or body? Is the frame unobstructed, no cropped limbs, no distracting background clutter? Does your expression look genuine rather than held? Does the outfit sit and fit the way it did when you tried it on?
2. Narrow to your top two or three. Don't try to compare ten photos at once. Human judgement gets noisy past three or four options, and you'll end up picking based on which one you looked at last rather than which one is actually strongest.
3. Test before you commit. A soft launch, updating your profile and watching how match rates shift over a few days, works, but it's slow and hard to isolate from other variables. Asking three or four trusted people for a quick opinion is faster, though a small group can carry its own bias if everyone shares similar taste. A privacy-first objective scoring tool gives you a third option: fast, consistent feedback without waiting days or leaning on one friend's subjective take. Experts generally recommend testing photos before a full rollout rather than guessing which shot will perform.
4. Read feedback as a pattern, not a verdict. One glowing comment or one lukewarm reaction doesn't tell you much on its own. What matters is whether the same photo keeps scoring well across different testers or test rounds. A shot that consistently performs well across modest sample sizes is a far more reliable signal than a single high score from one enthusiastic friend.
A practical checklist for picking dating photos can help you formalise this process so you're running the same criteria every time you refresh your profile, rather than reinventing the test each time.
Full body photo mistakes that quietly cost you matches
A handful of errors show up again and again, and most take five minutes to fix once you know what to look for.
- Mirror selfies. They almost always introduce visual clutter (bathroom tiles, phone glare, cropped edges) and read as low effort. Retake solo with a timer, or hand your phone to a friend for two minutes.
- Cropped group photos. A stray elbow or half a face at the edge of the frame makes viewers wonder who else was there, and whether that's actually you in the crop. Solo shots remove the ambiguity entirely.
- Heavy filters and body-hiding crops. Cropping out your legs, or applying a slimming filter, tends to erode trust the moment reality doesn't match the photo. Full, natural framing holds up far better on a first date.
- Bad shadows or awkward angles. Both are usually fixable without a reshoot. Move a couple of feet to change your relationship to the light source, or adjust the camera height by that same small 10 to 20 centimetre range mentioned earlier.
None of these require new equipment. They require slowing down for the extra thirty seconds it takes to check the frame before you hit the shutter.
What professionals and AI coaches actually look for in full body dating photos
Professional photographers judge full-body shots on three things above all else: posture, light, and honesty of proportion. Posture reads instantly, even in a small profile thumbnail, which is why photographers push movement and natural weight shifts over stiff, symmetrical stances.
An AI photo coach applies that same logic with more consistency than a single human opinion ever could. It scores composition, expression, and lighting the same way across every photo you upload, which removes the guesswork of wondering whether a friend's feedback reflects their taste or an actual flaw in the shot.
A full-body photo doesn't need to be a fashion shoot. Its job is reassurance, giving a viewer an honest, comfortable sense of who they'd be meeting, and a well-framed knees-up shot does that job just as well as a dramatic head-to-toe portrait.
The privacy side matters too. A one-time analysis that scores your photo and then discards it, rather than storing or training on it, means you get the benefit of objective feedback without your images sitting on a server indefinitely. That's the practical takeaway worth carrying into your next photo session: light well, pose naturally, frame from knees up when in doubt, and test the result before it goes live.
The team @ DoubleMyMatches: what our testing shows
The same handful of issues show up on repeat when we look at full-body photos people upload. Overly edited shots. Cropped group photos where it's genuinely unclear which person is the profile owner. Stiff, arms-straight posture that looks more like a passport queue than a dating profile.
The fixes are almost always small. Swap a cluttered background for a plain wall or a park path. Add one walking shot to break up static poses. Trade a held smile for a natural one caught mid-conversation. None of these require new clothes or a professional shoot.
What we'd encourage is treating your full-body photo the same way you'd treat any other decision you're not certain about: test it before you commit. A quick, objective check before uploading catches the problems a friend's kind feedback often misses.
— The Team @ DoubleMyMatches
A private, one time check before your full body photo goes live
Guesswork is the expensive part of profile photos, not the camera work. A photo scoring tool can provide an instant, app-specific score so you know whether that knees-up shot is actually pulling its weight before it's live in front of matches.

Such tools analyse lighting, composition, and expression in photos to indicate where a full-body shot should sit in a lineup and whether it is helping or holding you back. Some photo analysis services operate on a one-time basis where photos are scored and then discarded, without publishing or using them to train AI. If you're weighing this against a manual crowd-sourced rating site, the comparison of Photofeeler versus an AI photo analyser is worth a read. Otherwise, run your current lineup through the dating photo analyser and see exactly where your full-body shot ranks before you decide it's the one.
Sources
- 4 Must-Have Dating Profile Photos | Dating Photo Co
- Model poses photographers need to know | Photography Life
- Dating profile pictures – How to pick the right ones | eHarmony
- Full Body Photos for Online Dating | Karina Louise Photography